


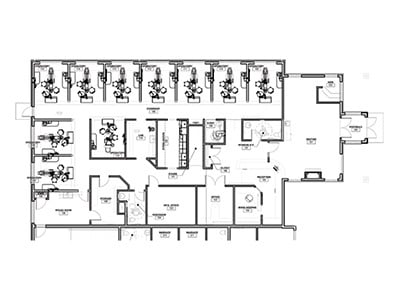

The dental office floor plan is one of the most entangled parts of a dental office design project. It impacts every other aspect of the project– aesthetics, equipment, location, budget– but is also determined by these aspects. This relationship results in a circular planning process that can be difficult to navigate.
However, spending the time to develop a good floor plan is vital to the health of your practice. A well-designed office improves the well-being and effectiveness of your team while making patients feel comfortable and secure.
Some parts of a dental office floor plan are relatively standard, while others are entirely unique. Whether you’re building, renovating, or expanding your existing office, keep in mind the following advice and best practices from our design team.
Want to jump straight into designs? See Our Dental Office Floor Plan Gallery
Dental Office Floor Plan Best Practices
At Goetze Dental, we’ve developed a number of best practices for dental office design; check out these 9 tips for designing your dental office design here! Below are best practices that relate specifically to developing your floor plan:
- Design operatory-out. The operatory is the heart of the practice for both you and your patients. Operatories should be the first rooms positioned on the floor plan, with everything else being built out to support them.
- Include your team in the planning. The layout of the office will also impact your team. Make sure you listen to their feedback and consider their ideas. Your team can help you design an office that sets them up for success.
- Work with dental office designs pros. Creating a dental office floor plan is more than just placing operatories and a reception area. Critical components like electrical and plumbing must also be included. When you work with a professional dental office design team like the one from Goetze Dental, you can be sure all your bases are covered.
- Choose the right-size office space. Most doctors underestimate how much space they will need in their new office. As a rule of thumb, you should plan for 500 square feet per operatory. For example, a 2,000-square-foot office can easily accommodate four operatories and all critical clinical spaces.
Creating Your Dental Office Floor Plan
Dental offices have a lot of rooms, including team lounges, private offices, and of course, restrooms. In this chapter, however, we’re going to focus on a few of the most important spaces for a dental office: Operatories, reception area, and critical clinical areas.
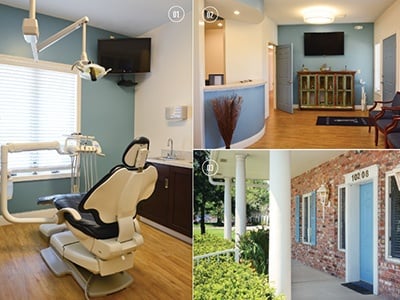
You want to design an office that is uniquely you, but that doesn’t mean you have to start from scratch. Flip through our dental office floor plan gallery for inspiration.
Operatory Floor Plan
Operatories are the core of your practice. More time will be spent here than anywhere else in the office. As such, we’ve spent a lot of time learning how to create the ideal operatory:
- Ideal size is 10x12 feet. Patients and doctors prefer more spacious operatories than they used to. Older offices might have 6x7 foot operatories, but we recommend almost twice that size today. This isn’t just about preference, either. Operatories today need space for more equipment, like computers and digital imaging, along with handicap accessibility considerations.
- Position along the perimeter. Patients today also prefer operatories to be open, not enclosed in the center of the office. Position operatories along the perimeter of the office with windows looking out. This gives patients and team members more natural light and a nice view during appointments.
- Minimize twisting. Operatories should be set up for the comfort and health of you and your team. Equipment and supplies should be within arm’s reach of the doctor without twisting or getting up out of their seat. This can be achieved regardless of your preferred delivery position.
- Customize for each doctor. Operatories are not one-size-fits-all. When designing a new office, operatories should be set up to fit the specific needs of those using them. Whether a particular doctor is tall, left-handed, or has chronic back problems, the operatories should be comfortable for everyone to use.
- Open concept with central cabinets. A common space-saving solution is an open concept operatory design, where cabinetry is used to separate operatories as opposed to walls. Offices with open concept operatories can also have private operatories for speciality procedures.

Reception Area Floor Plan
The reception area is a patient’s first impression of your office. It will set the tone for the rest of the appointment. Keep these things in mind as you design the floor plan for this area:
- Two reception area chairs per operatory. If you’re trying to decide how much space to have in your reception area, keep this rule of thumb in mind. Usually, two reception area chairs per operatory will give all your guests enough room. If you do a lot of pediatric work, then you might want three chairs per room as space for waiting parents and siblings. For example, Parkcrest Dental in Springfield, Missouri has a 92-seat reception area for 38 operatories. They have an entire wing dedicated to pediatric work, so they used the ratio of 2.5 reception area chairs per operatory to accommodate those accompanying their young patients.
- Children’s area. If you work with a lot of families, then including a children’s area might be a smart idea. It will make parents feel more comfortable bringing their children to the office when they know they will have things to do.
- Vestibule. Vestibules provide a barrier between the reception room and the elements outside. Whether it’s rain, cold or blazing heat, the vestibule will help keep the reception area comfortable.
- Unique design. The reception area is the perfect place to show off your personality and brand. Whether you cover the walls with fish and scuba divers (like Dentistry for Children) or display art from the local high school (like Kanning Dental), here is your chance to make your office truly unique and special.
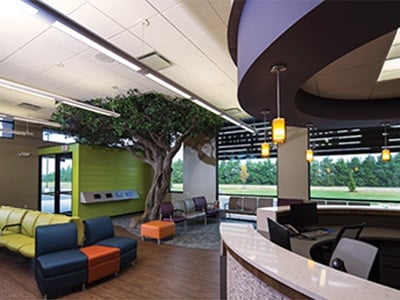
See more reception area design ideas
Critical Clinical Areas
After planning out the operatories and reception area, doctors should turn their attention to sterilization, lab, and digital imaging centers. Unlike reception and operatories, some of these spaces are optional, so it’s important to consider your individual practice’s needs. Here are a few design points to remember when planning your dental office floor plan:
- Central sterilization. Every operatory needs easy access to sterilization. Many offices place sterilization in the center of the practice and create at least two points of access to facilitate efficiency.
- Lab. The needs of your practice determine if you need a lab and if so, the size of your lab will determine the space allocated. Consider whether your practice will incorporate in-office milling or printing, and the space required for those devices.
- Digital Imaging. Like a lab, the need for digital imaging solutions changes from practice to practice. Each brand and model of 3D CBCT and traditional digital pans have unique space requirements that may inform your space allocation.
- Mechanical Room. The size and location of this space is largely determined by the structure of your building. Considerations include whether or not you have a free-standing building with a basement, if your office building has multiple floors, or if the building has special ventilation requirements. Your Goetze dental office design team will help you navigate those specifics.
- Dental Supply Storage. Most offices choose a centrally located, easily accessible space for their supply closet. This is another space to consider planning for eventual growth. As the practice serves more patients, you will need the space to keep more supplies on hand.
Equipment: Finalizing the Floor Plan
After positioning each room on your floor plan, the last step is to finalize the equipment. Depending on your equipment choices, the floor plan may need to be adjusted to fit. Once the floor plan and equipment are determined, utilities are ready to be called out for construction.
Equipment is a critical part of the dental office design plan. Read more about choosing the right equipment for your new dental office in another one of our blog posts.
Need more specific help? We are standing by!